Introduction
Electronic forms constitute the graphical interface of the docuRob ® WorkFlow platform runtime environment. The structure describing the business model, classification and description of the form content are created and stored in the Concept Map Navigator. When creating a form, you should start by creating the attribute structure of the object that is to be represented by the electronic form.
Various types of objects described by dedicated sets of metadata can be managed in processes. These can be documents, devices, projects, patents, entities, tasks, regulations, plans, permits, invoices, experts and many others. There are no limits to the scope and nature of domain applications.
Creating an object type
This section presents a complete design flow for creating an object type for the sample form. To create an object type, expand Process and Form Design in the Navigator menu, select Object Types, and then click the Add button located below the displayed list of object types ( Figure 1 ).

Figure 1. Adding object types
In the Object Type creation window ( Figure 2 ) fill in the mandatory fields: Name and Identifier. You can optionally add a description of the object type in the Description field.
If the object type being created is to be mapped to a database, select the Save to DB check box. Providing a DB table name is optional. If you do not provide this name, the system will create a table with a default name according to the rule: f_<object type identifier>.
Finally, confirm by clicking the Save button.
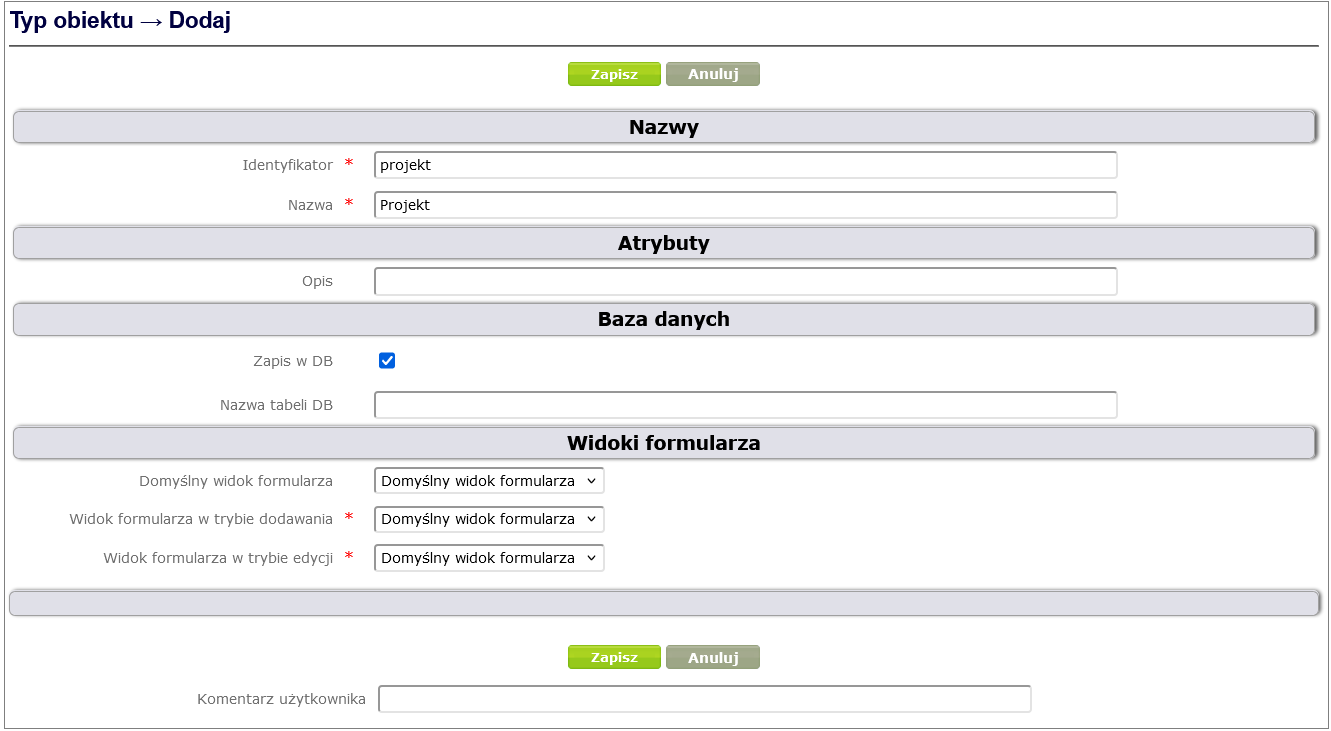
Figure 2. Creating a new object type
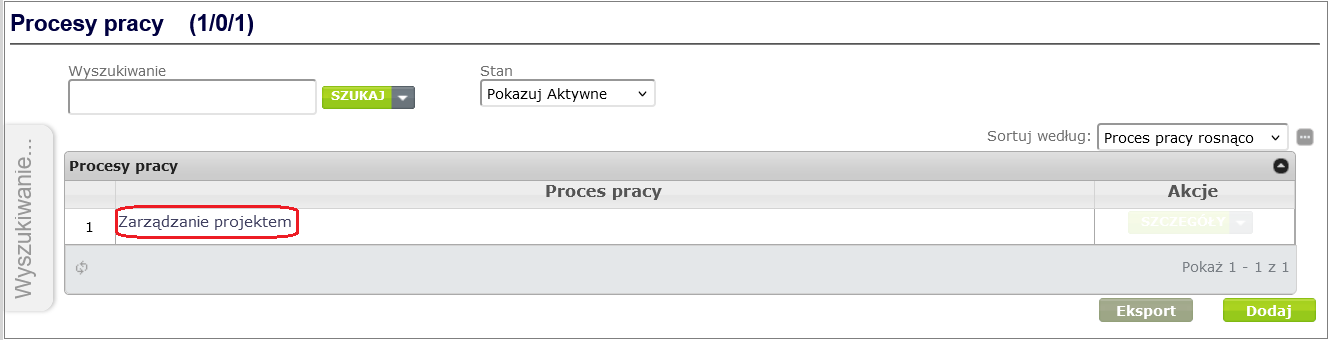
The newly created object type appears in the Object Types table ( Figure 3 ).

Figure 3. Object type Project in the object type list
object type is displayed.
Adding attributes
Objects are described using attributes, which are then mapped to a form representing the object type. Object attributes are therefore ultimately form fields.
We distinguish the following types of object attributes:
- simple object attributes – attributes such as text, number, date, logical value, dictionary, etc.;
- complex object attributes – attributes that contain simple attributes. Complex attributes are used, among other things, to create tables in forms.
We will demonstrate adding attributes using an example object type: Project.
Let's assume that Projects are to be described using the following set of attributes:
| No. | Attribute name | Attribute type |
|---|---|---|
| 1 | Title | Multi-line text |
| 2 | Acronym | Writing |
| 3 | Project number | Writing- |
| 4 | Description | Multi-line text |
| 5 | Value | Numerical |
| 6 | Start date | Date |
| 7 | End Date | Date |
| 8 | Status | Dictionary |
| 9 | Description of the current state | Multi-line text |
| 10 | Results / Summary | Multi-line text |
| 11 | Entities in the project | Composite attribute |
| 12 | Authors | Composite attribute |
Table 1. Attributes of an example Project
To create an object attribute, expand Process and Form Design in the Navigator menu, select Object Attributes, and then click the Add button below the displayed list of attributes ( Figure 7 ).

Figure 4. Adding object attributes
From the displayed list of object attribute types, select the appropriate type.
We will create the Title attribute of the Project object. This is a simple attribute of the object ( Multiline Text ), so we select the Object Attribute item ( Figure 5 ).

Figure 5. List of object attribute types
In the Object Attribute creation window ( Figure 6 ), fill in the mandatory fields: Name, Identifier and Type. You can optionally add a description of the object type in the Description field.
If the object attribute being created is to be mapped to the database, select the Save in DB check box. Providing the DB column name is optional. If this name is not provided, the system will create a column with a default name according to the rule: <object attribute identifier>.
Finally, confirm by clicking the Save button.
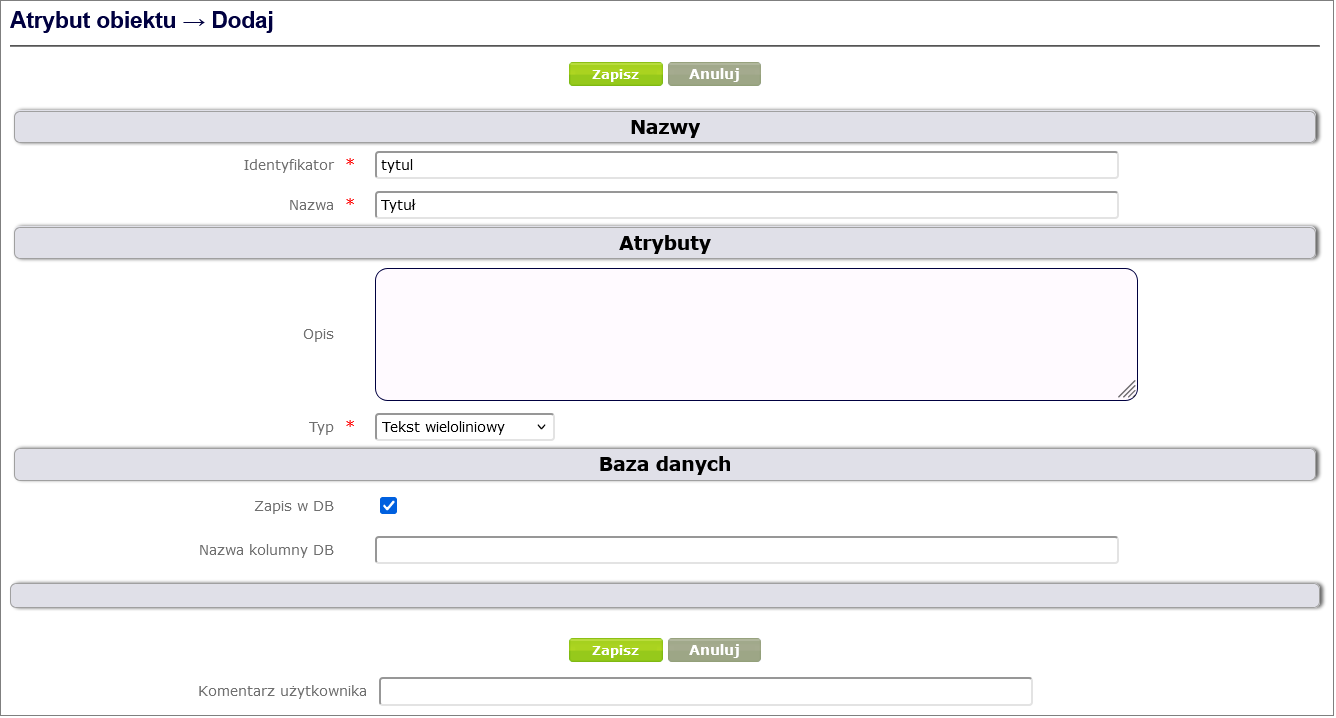
Figure 6. Creating an object attribute
In order to link an object attribute to an object type (in our case Project ), go to the object type details window created in the Create object type chapter ( Designing processes and forms -> Object types and selecting the appropriate object type from the table by clicking on its name). After selecting the Object attributes option, a page with the object attribute table will open. By clicking the Add button under the table, you can add an attribute to the object type ( Figure 7 ).
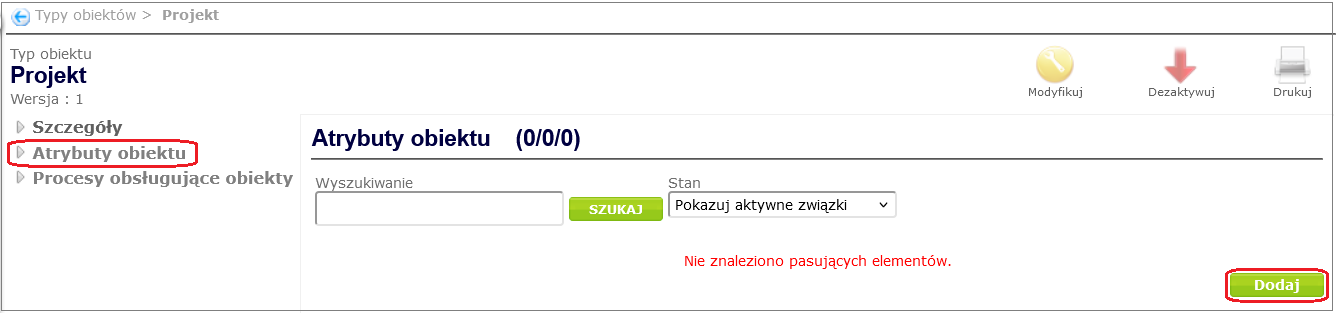
Figure 7. Attribute association with object type
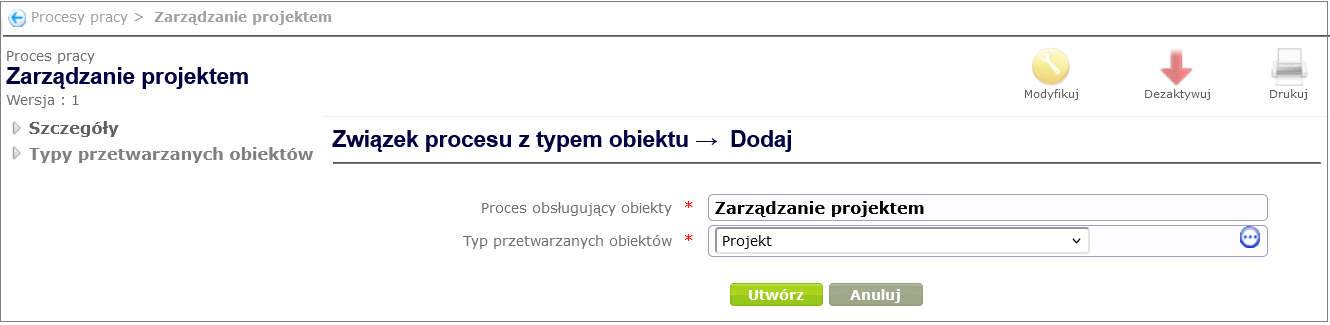
In the window that appears, select an attribute from the dictionary and then click the Create button ( Figure 8 ).

Figure 8. Creating an object type association with an attribute
In the same way, we create the remaining simple attributes for the Project object type and their associations with the Project. When creating attributes, we select the appropriate type ( Figure 9 shows examples).

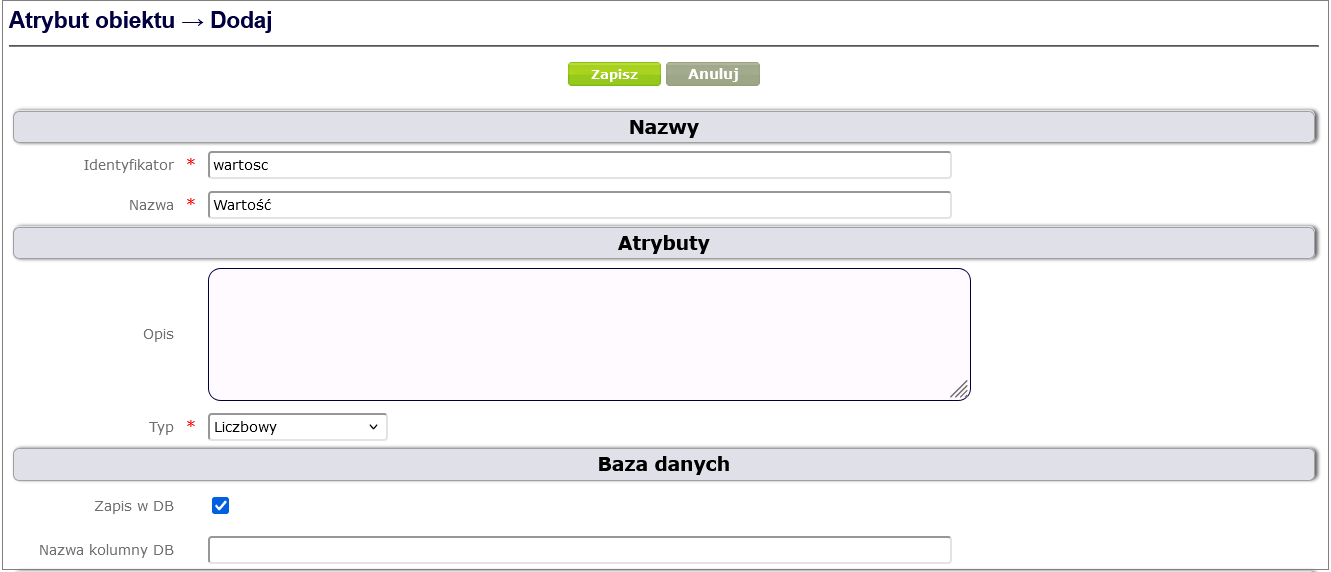
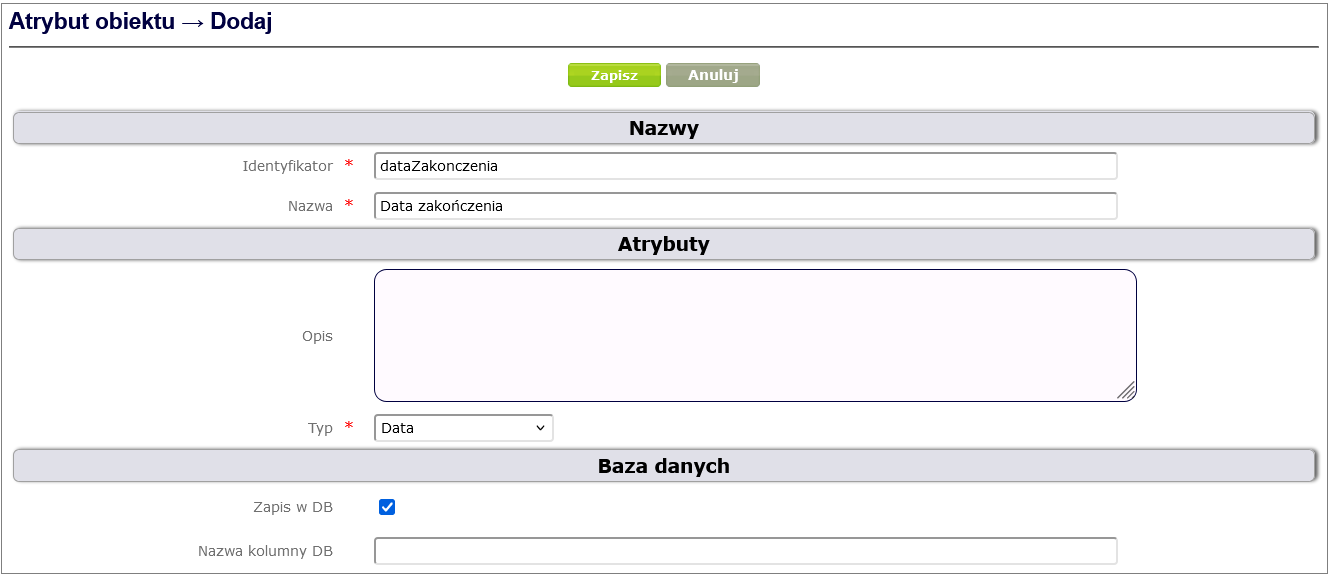
Figure 9. Examples of creating simple attributes for the Project
Figure 10 shows the list of simple attributes associated with the Project object type.
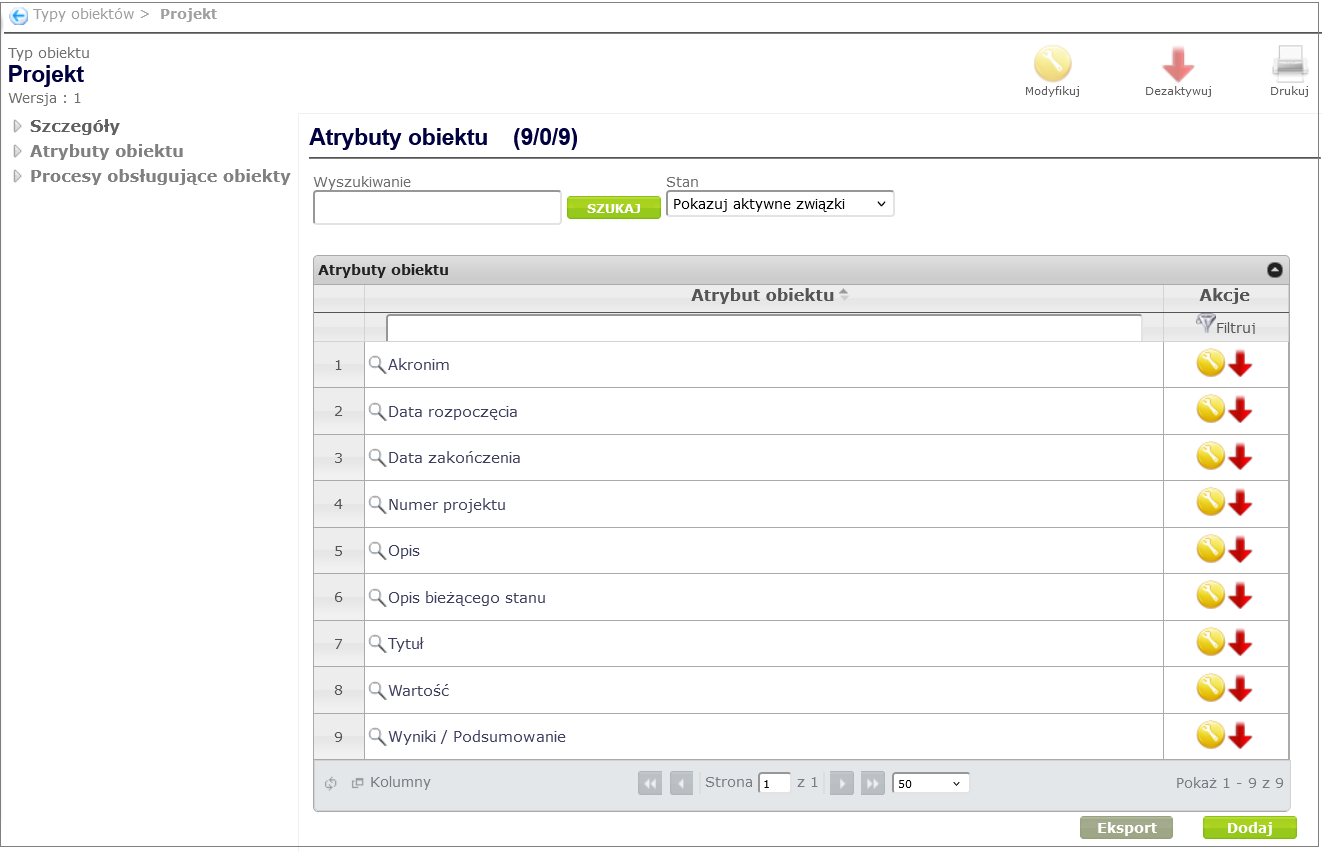
Figure 10. List of simple attributes associated with the Project object type
The list of sample attributes for Project ( Table 1 ) includes the Status attribute, which is a dictionary attribute. The creation of a dictionary attribute must be preceded by the creation of an appropriate dictionary.
To create a dictionary, expand the Process and Form Design item in the Navigator menu, select the Form and Workflow Dictionaries item, and then click the Add button ( Figure 11 ).

Figure 11. Adding a dictionary
In the dictionary adding window ( Figure 12 ) you must fill in the required fields: Identifier and Name. You can optionally add a description. Finally, confirm with the Save button.
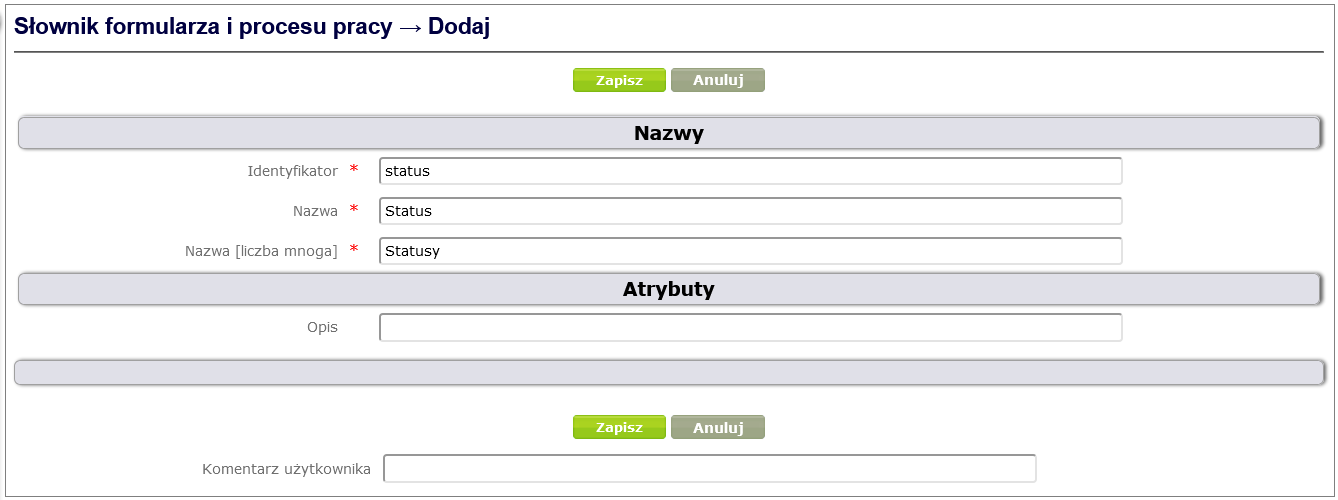
Figure 12. Dictionary adding window
In the next step, you need to specify the names and attributes for the entries of a given dictionary. For a simple dictionary of the Status type*,* we will only use the name and identifier of each entry.
To add name types to the dictionary (in our case Status ), go to the dictionary details window ( Process and form design -> Dictionaries of forms and work processes, select the appropriate dictionary from the displayed list by clicking on its name), and then after selecting the Names option from the dictionary context menu, click the Add button ( Figure 13 ).
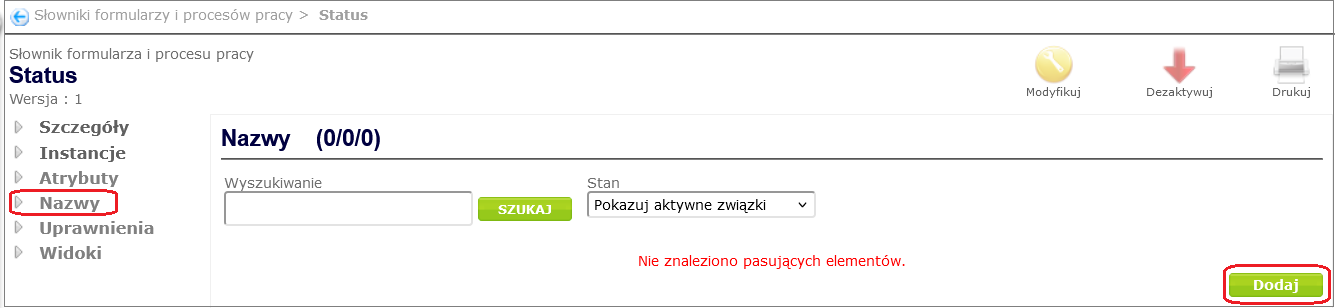
Figure 13. Adding Name Types
For the Status dictionary we will add two types of names:
- Identifier
- Name
Figure 14 shows the window for creating an Identifier for the Status dictionary entry*.*
By selecting from the dictionary (icon with 3 dots) in the Name Properties field, we define the following properties of the Identifier:
- Unique -> Means that two concepts belonging to a given dictionary cannot have an identical Identifier.
- Use for creating PSI instances -> Indicates that the Identifier will be used as part of the Public Identifier when creating a concept.
- Required -> Indicates that dictionary instances must have a non-empty value defined for Identifier.

Figure 14. Creating an Identifier for a Dictionary Entry
Finally, click the Create button.
Figure 15 shows the window for creating a Name for the Status dictionary entry*.*
We define the name properties similarly as for the Identifier, except for the Name we specify that it should be unique and required.
Additionally, we define the scope of the Name's use by selecting the field Visible scope of the item from the dictionary, which is important for displaying dictionary items if several name types are defined. In our case, thanks to the setting visible in the Visibility scope field, the Name will be visible by default.
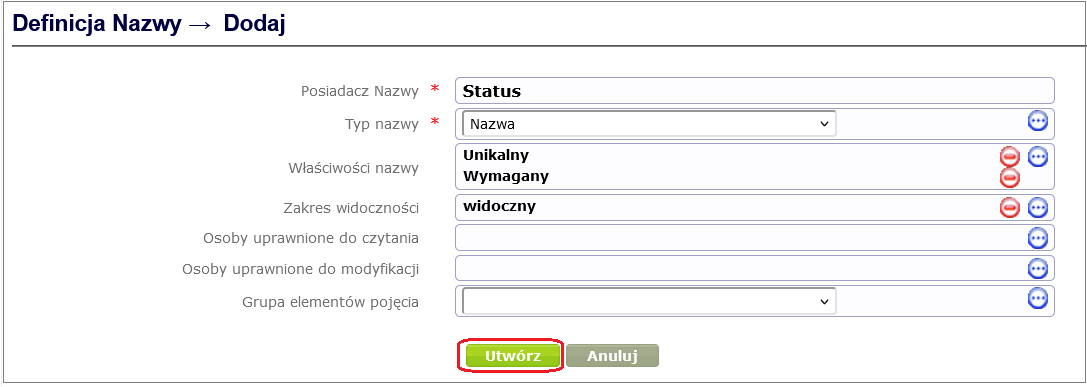
Figure 15. Creating a Name for a Dictionary Entry
In the next step, you need to grant permissions to read the dictionary (for all users) and to create and modify dictionary entries (for the designer).
To add dictionary permissions, go to the dictionary details window, and then, after selecting the Permissions option from the dictionary context menu, click the Add button ( Figure 16 ).
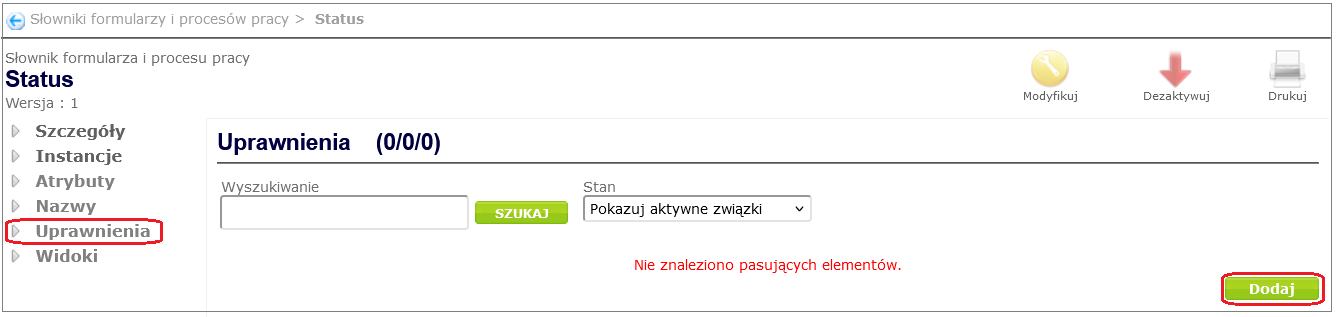
Figure 16. Adding permissions to the dictionary
In the window for adding permissions, fill in the required fields and then click the Create button. Figure 17 shows adding reading permissions for all users.
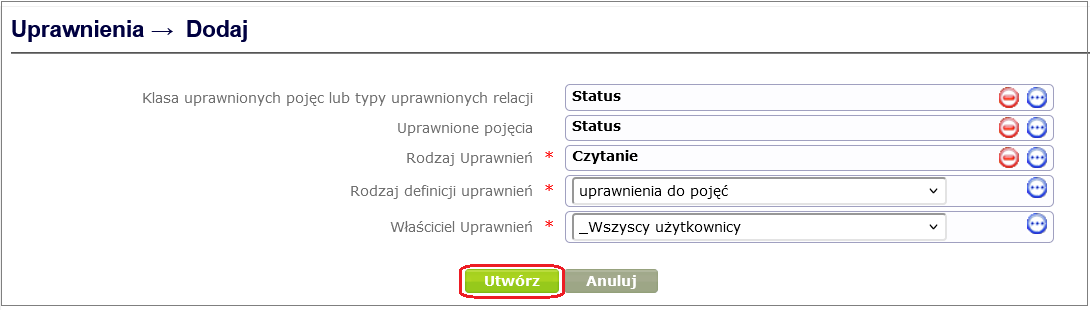
Figure 17. Adding permissions to read
Figure 18 shows adding permissions to create, modify, deactivate and activate dictionary entries for the process and form designer.
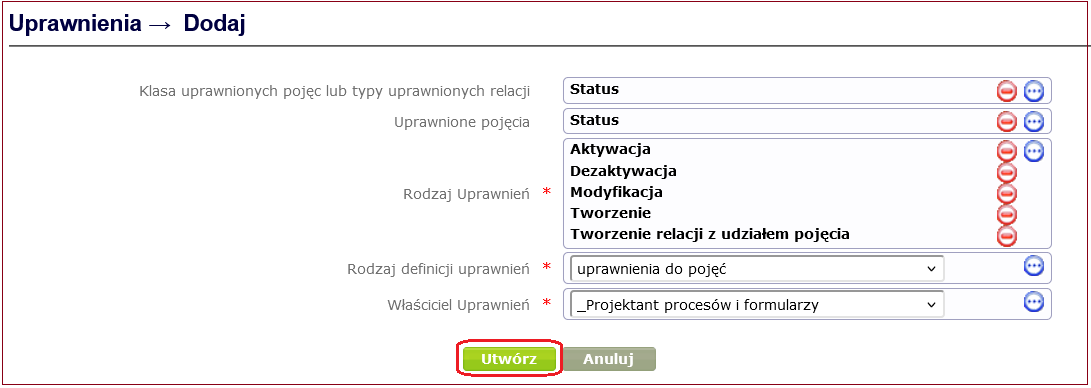
Figure 18. Adding permissions to create and modify dictionary entries
After logging in, the designer can now add individual items to the dictionary.
To add an item to the dictionary, go to the dictionary details window and then, after selecting the Instances option from the dictionary context menu, click the Add button ( Figure 19 ).
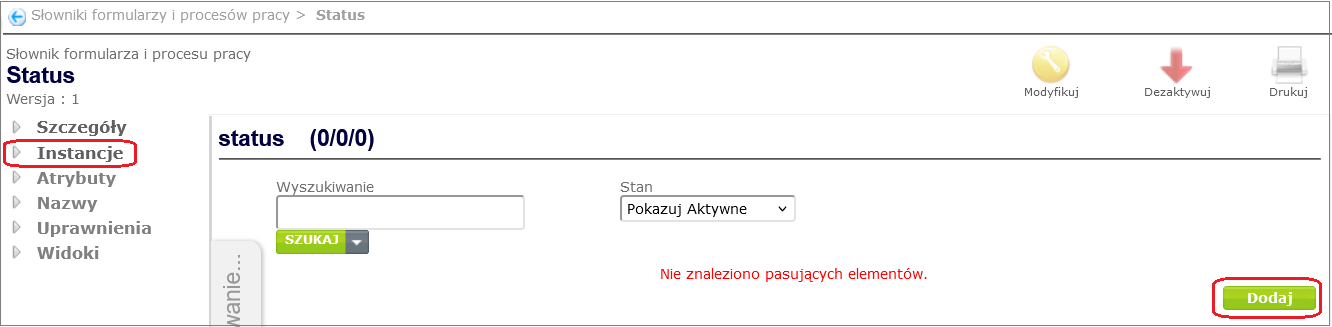
Figure 19. Adding dictionary entries to the Status dictionary
Status dictionary will have the following entries:
- In progress
- Completed / Unrealized
- Completed / realized
In the window for adding a new status, fill in the mandatory fields Identifier and Name, and then click the Save button ( Figure 20 ).
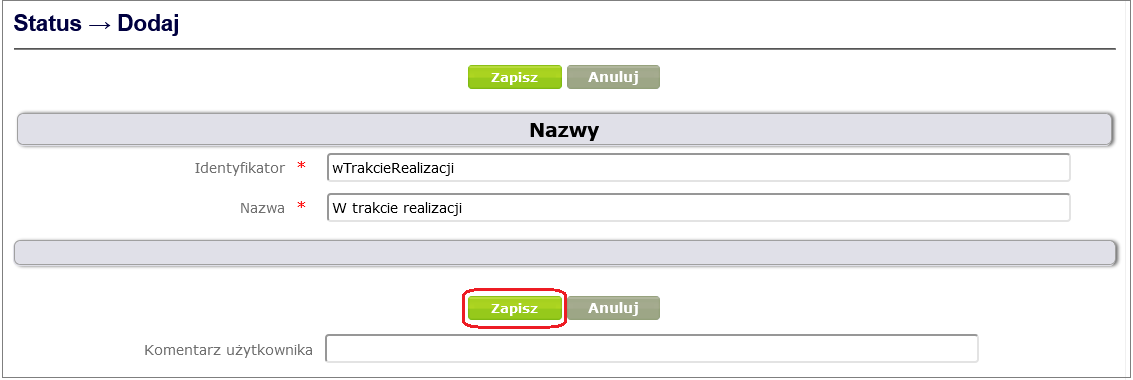
Figure 20. Creating a new status in the Status dictionary
In the same way, add the remaining statuses to the dictionary. Figure 21 shows the resulting list of statuses in the Status dictionary.
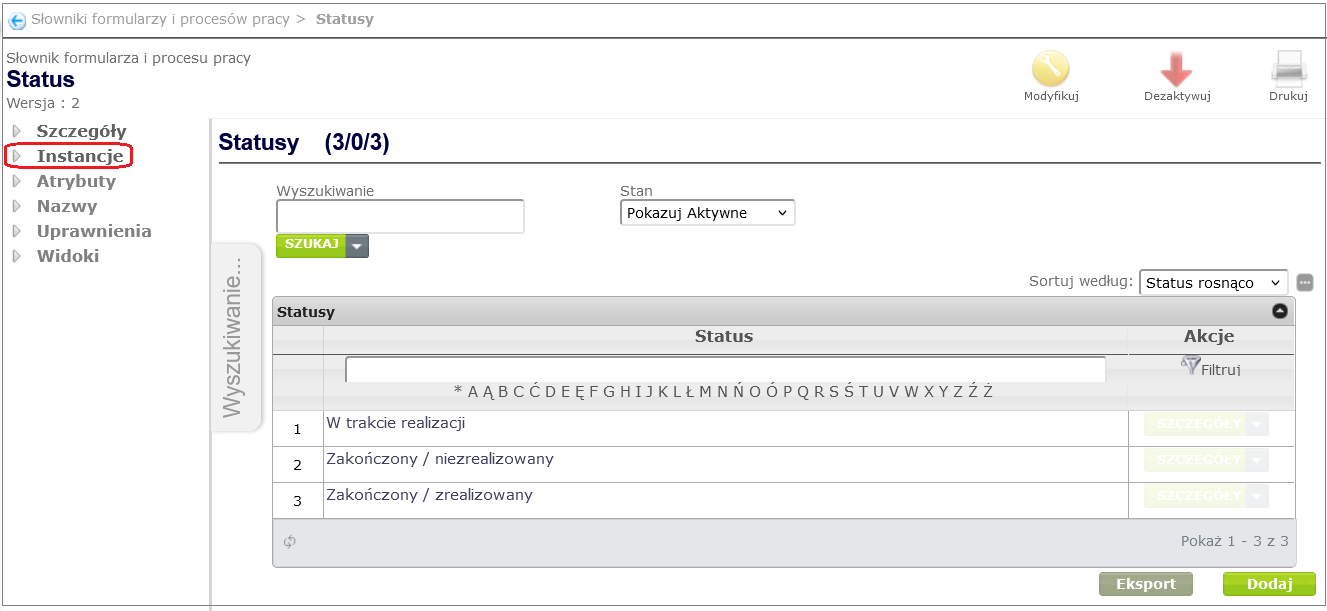
Figure 21. List of statuses in the Status dictionary
After adding the dictionary, we will create the Status attribute of the Design object ( Table 1 ) by clicking on Process and Form Design -> Object Attributes -> Add. This is a dictionary type attribute, so we select the Dictionary object attribute item ( Figure 5 ).
In the window for creating a Dictionary object attribute ( Figure 22 ), fill in the required fields: Name, Identifier, Type and Dictionary. In the Type field, select Dictionary, in the Dictionary field*,* select the appropriate dictionary from the displayed list, in our case – Status. You can optionally add a description of the attribute in the Description field*.*
If the dictionary attribute of the object being created is to be mapped to the database, the Save in DB check box should be selected. Providing the DB column name is optional. If this name is not provided, the system will create two columns with default names according to the rule: <attribute identifier> and <attribute identifier>_ label, containing the identifier of the selected dictionary entry and the name of this entry, respectively.
Finally, confirm by clicking the Save button.
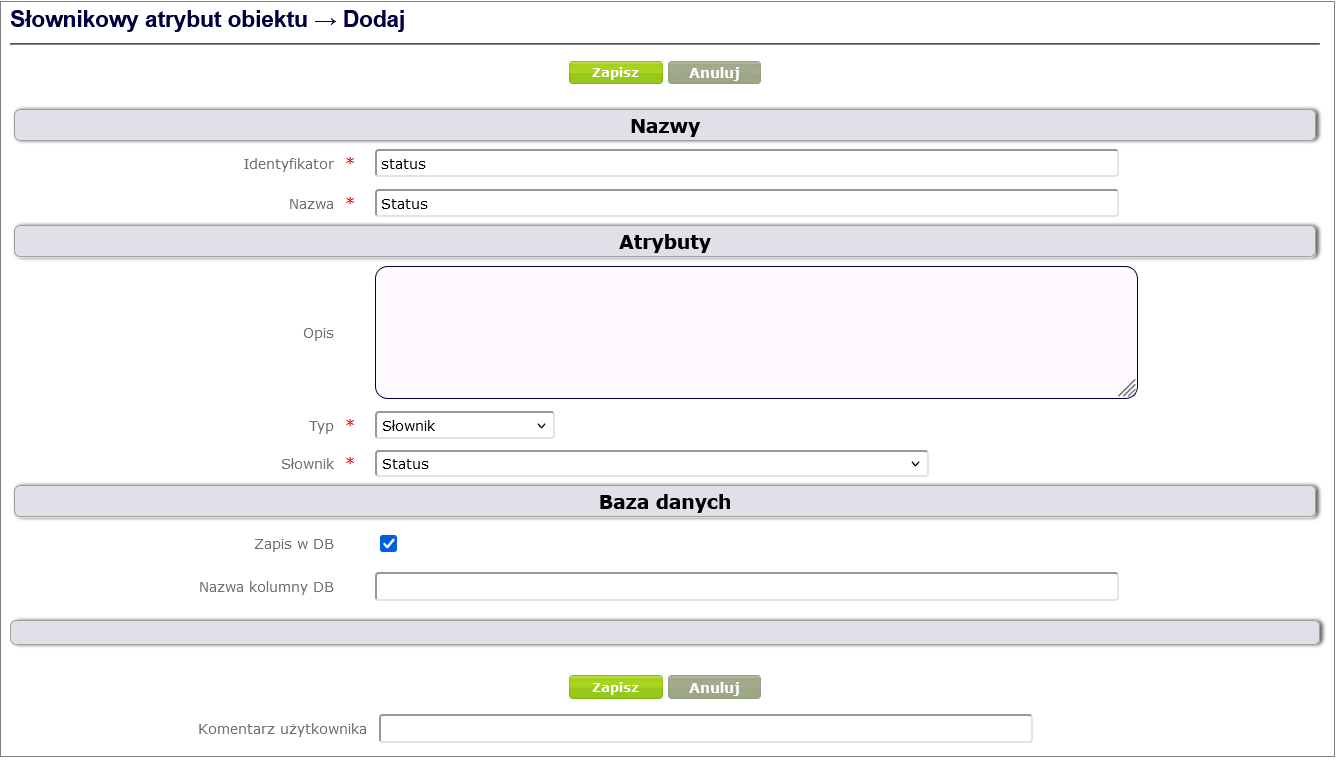
Figure 22. Creating a dictionary object attribute
The created dictionary attribute Status should be associated with the Project object type in the same way as the simple attribute associations were added: Object type -> Project -> Object attributes -> Add -> Attribute assignment ( Figure 23 ).
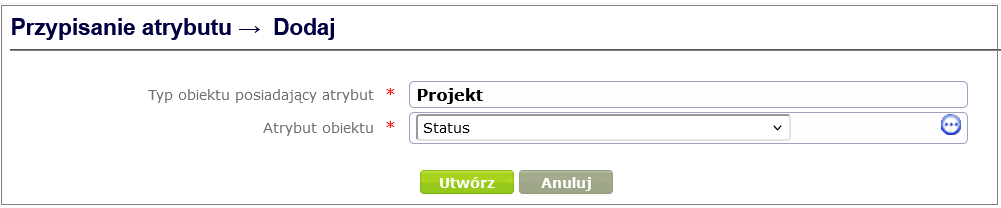
Figure 23. Assigning the Status attribute to the Project object type.
According to the list of sample attributes for the Project ( Table 1 ), there are two more attributes to define and associate with the Project. These are composite attributes:
- Entities in the project
- Authors
Composite attributes include simple attributes.
The Entities in the project composite attribute will contain the following attributes:
| Attribute name | Type attribute |
|---|---|
| Subject | Text multiline |
| The role of the entity in the project | Dictionary |
Authors composite attribute will contain the following attributes:
| Attribute name | Type attribute |
|---|---|
| Person | Writing |
| Role of a person in the project | Dictionary |
To define a complex attribute, click Process and form design -> Object attributes -> Add, select Complex object attribute, fill in the required fields and finally click the Save button ( Figure 24 ).

Figure 24. Creating a Composite Attribute
Next, you need to create the attributes that make up the composite attribute. We create these attributes according to the procedure described above. These are:
- simple attribute Multiline Text entity ( Figure 25 )
- dictionary attribute The role of the entity in the project ( Figure 27 ) for which a dictionary should be created ( Figure 26 ).

Figure 25. Simple attribute Multiline text entity
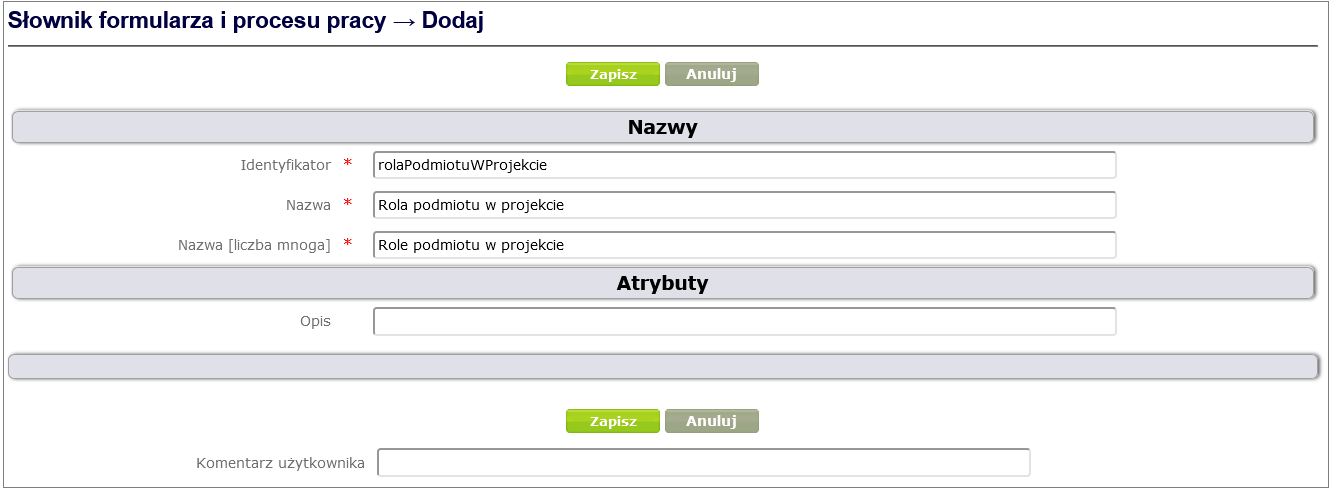
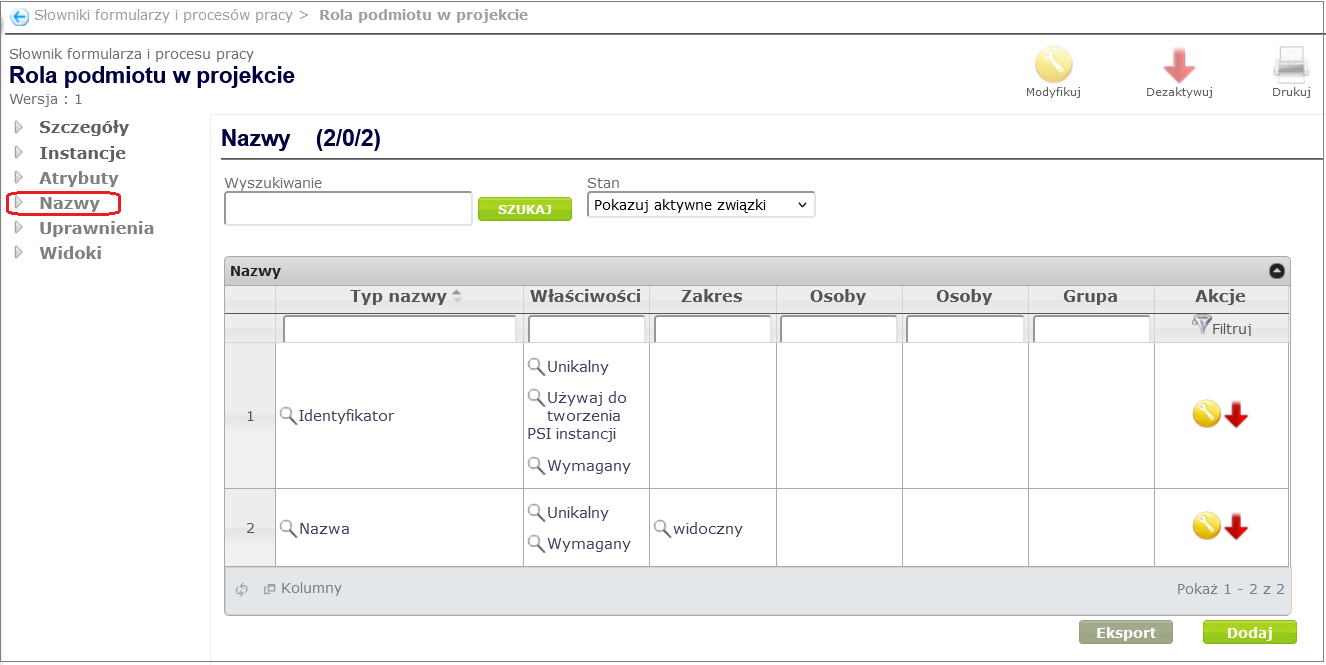
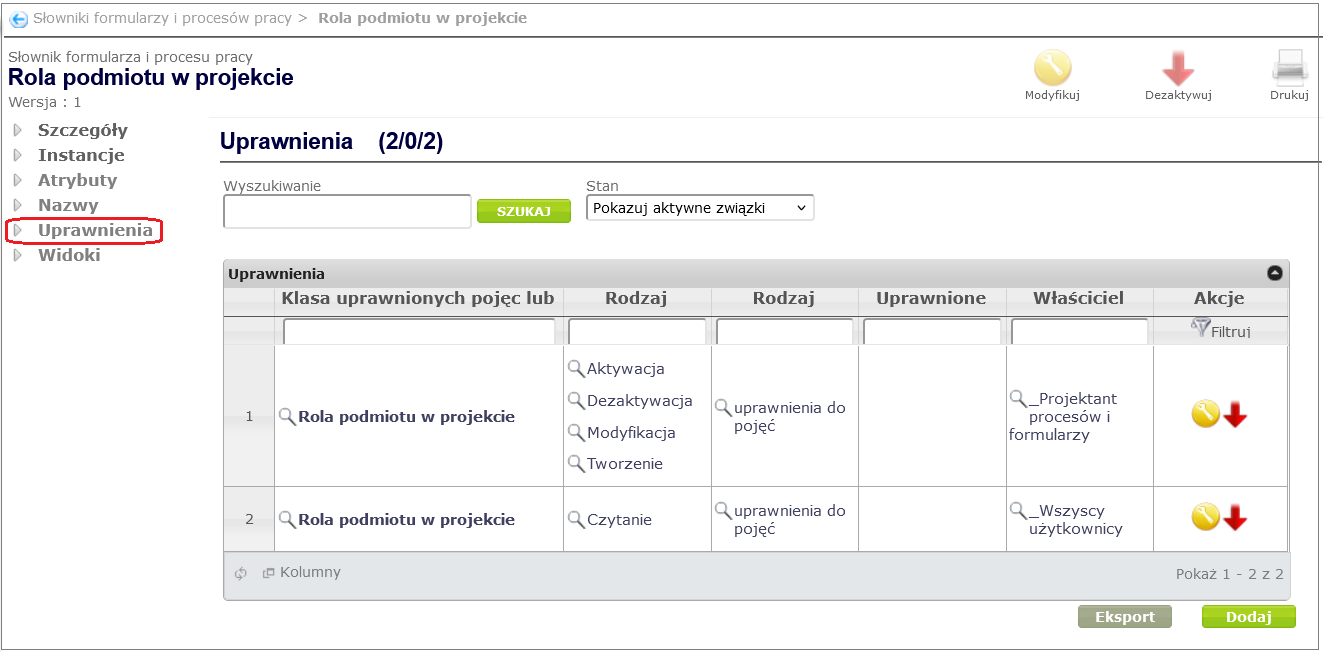
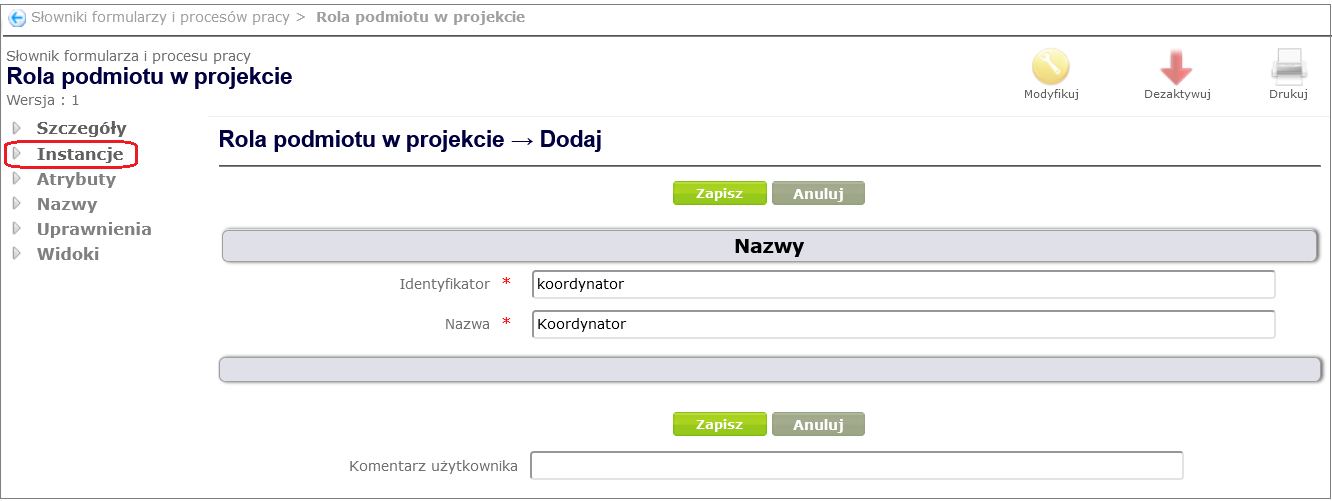
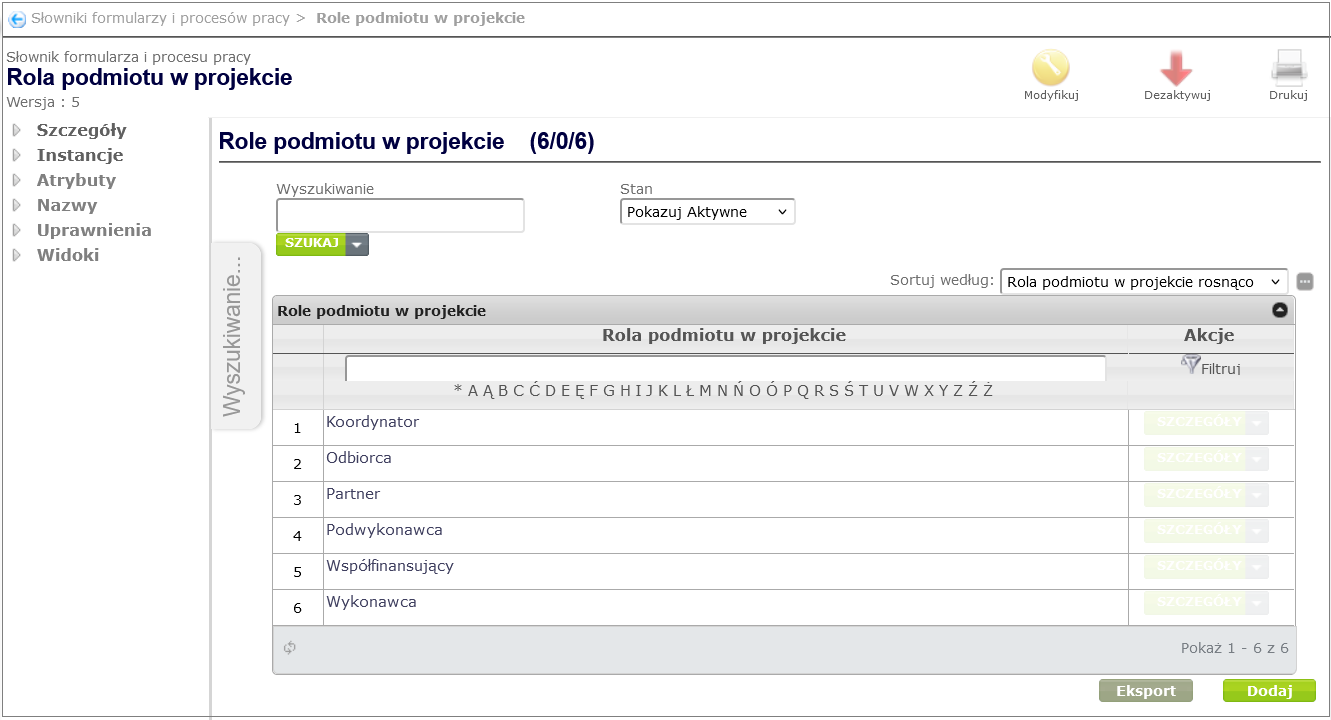
Figure 26. Dictionary Role of the entity in the project
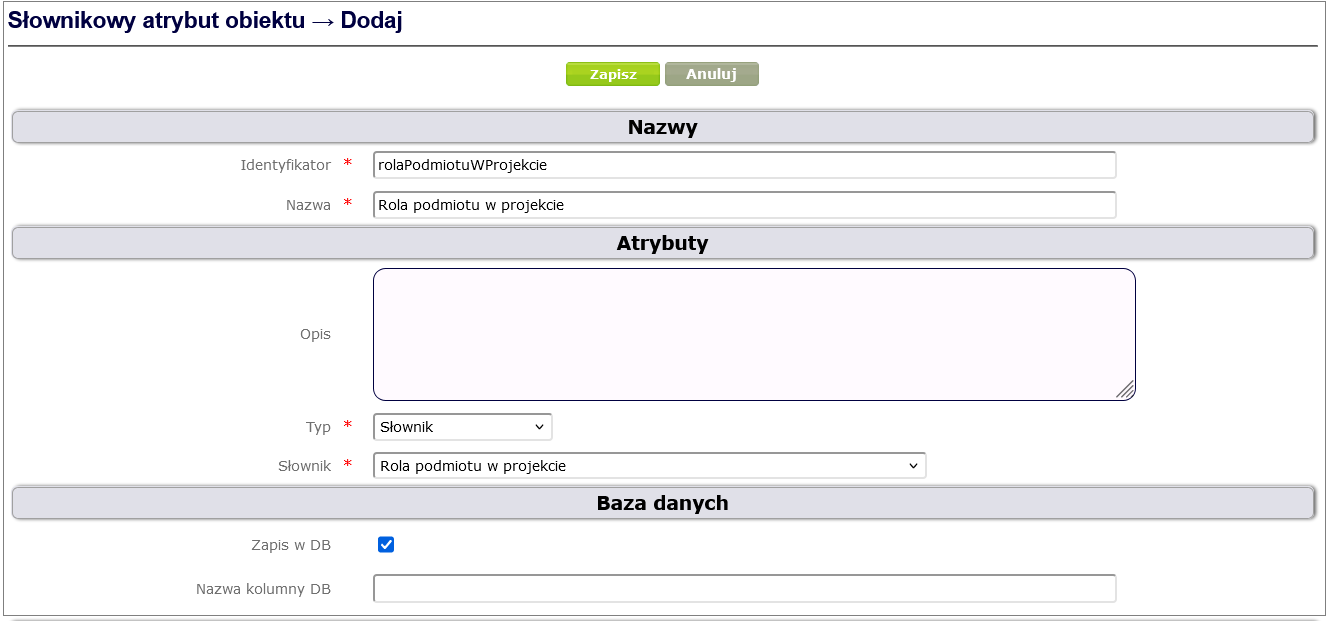
Figure 27. Dictionary attribute Role of the entity in the project
In the next step, you should assign the attributes created above to the Entities in the project complex attribute ( Figure 28 ) and link the complex attribute to the Project object type ( Figure 29 ).
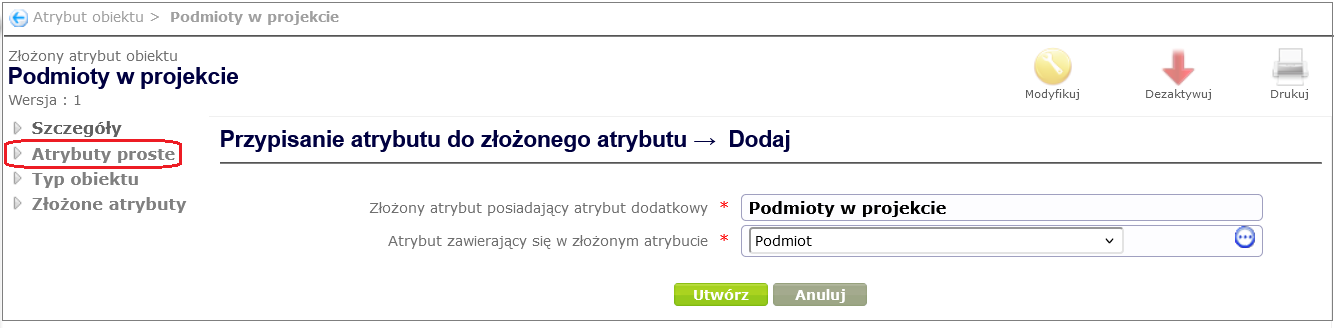
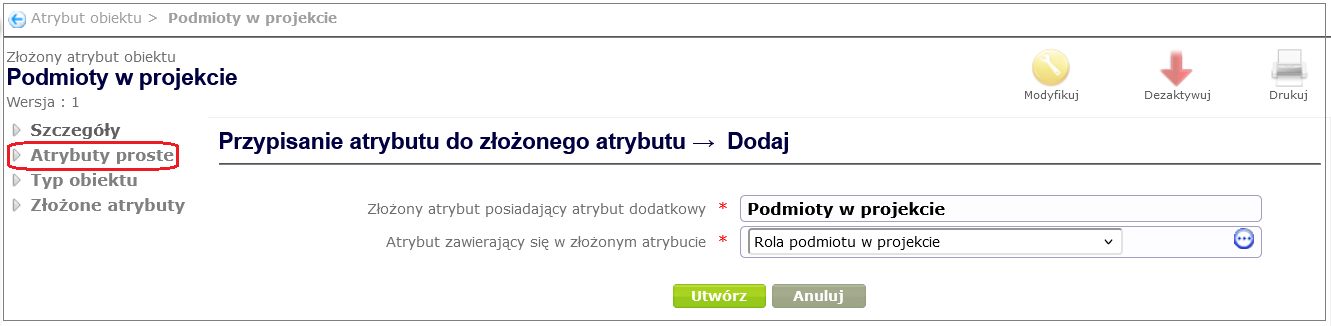
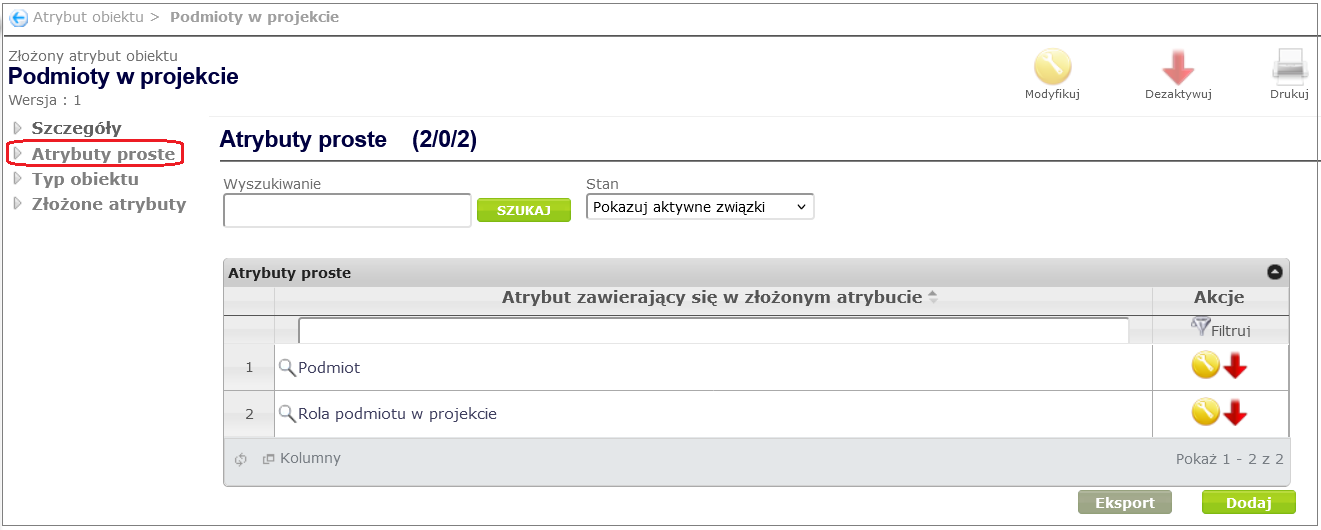
Figure 28. Assigning attributes to a composite attribute
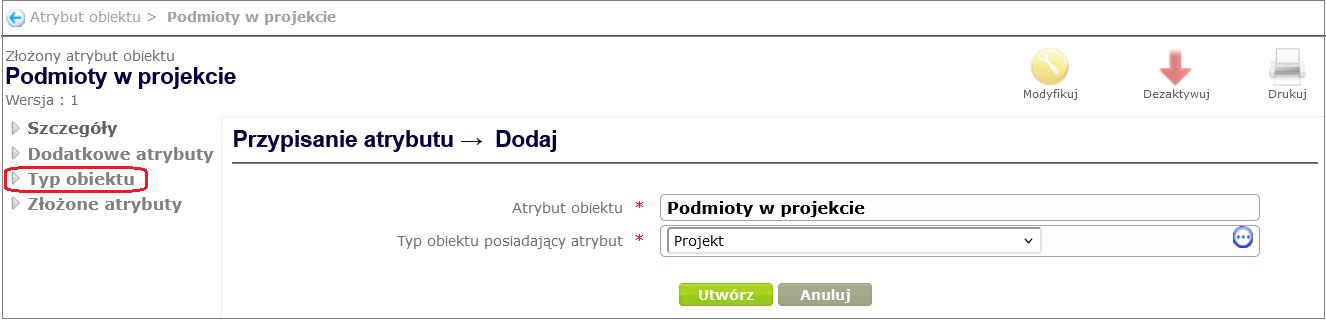
Figure 29. Assigning an attribute to an object type
In the same way, you should add the complex attribute Authors ( Figure 30 ) containing two simple attributes: Person (of the Inscription type ) and Role of the person in the project (of the Dictionary type), and add the dictionary Role of the person in the project with the positions: Manager, Author.
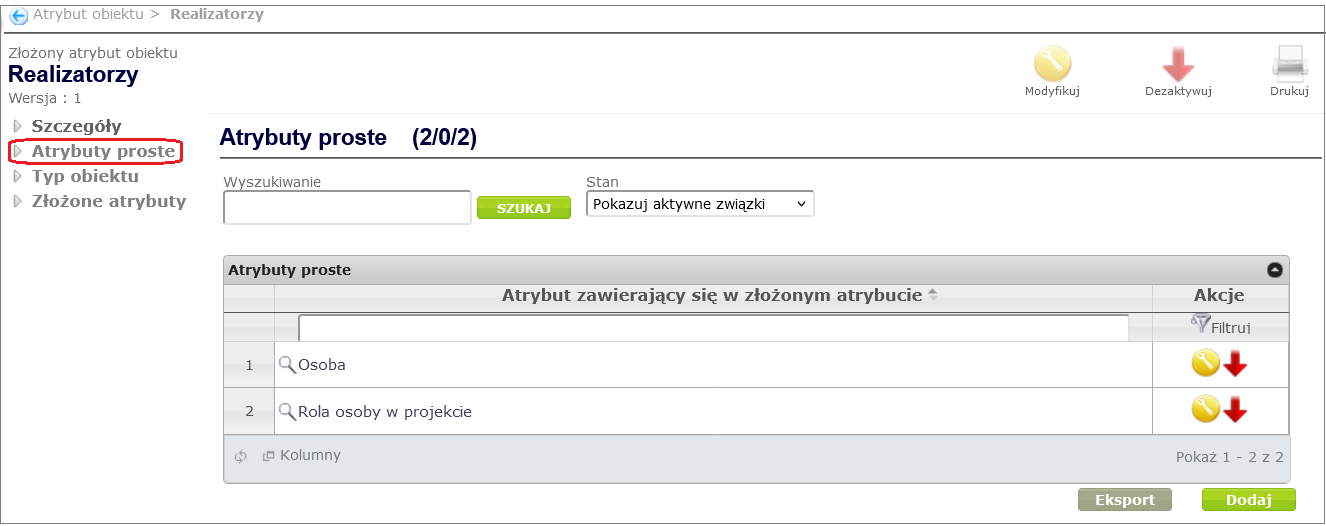
Figure 30. Composite attribute Authors
As a result, the Project object type contains all the attributes from Table 1 ( Figure 31 ) .
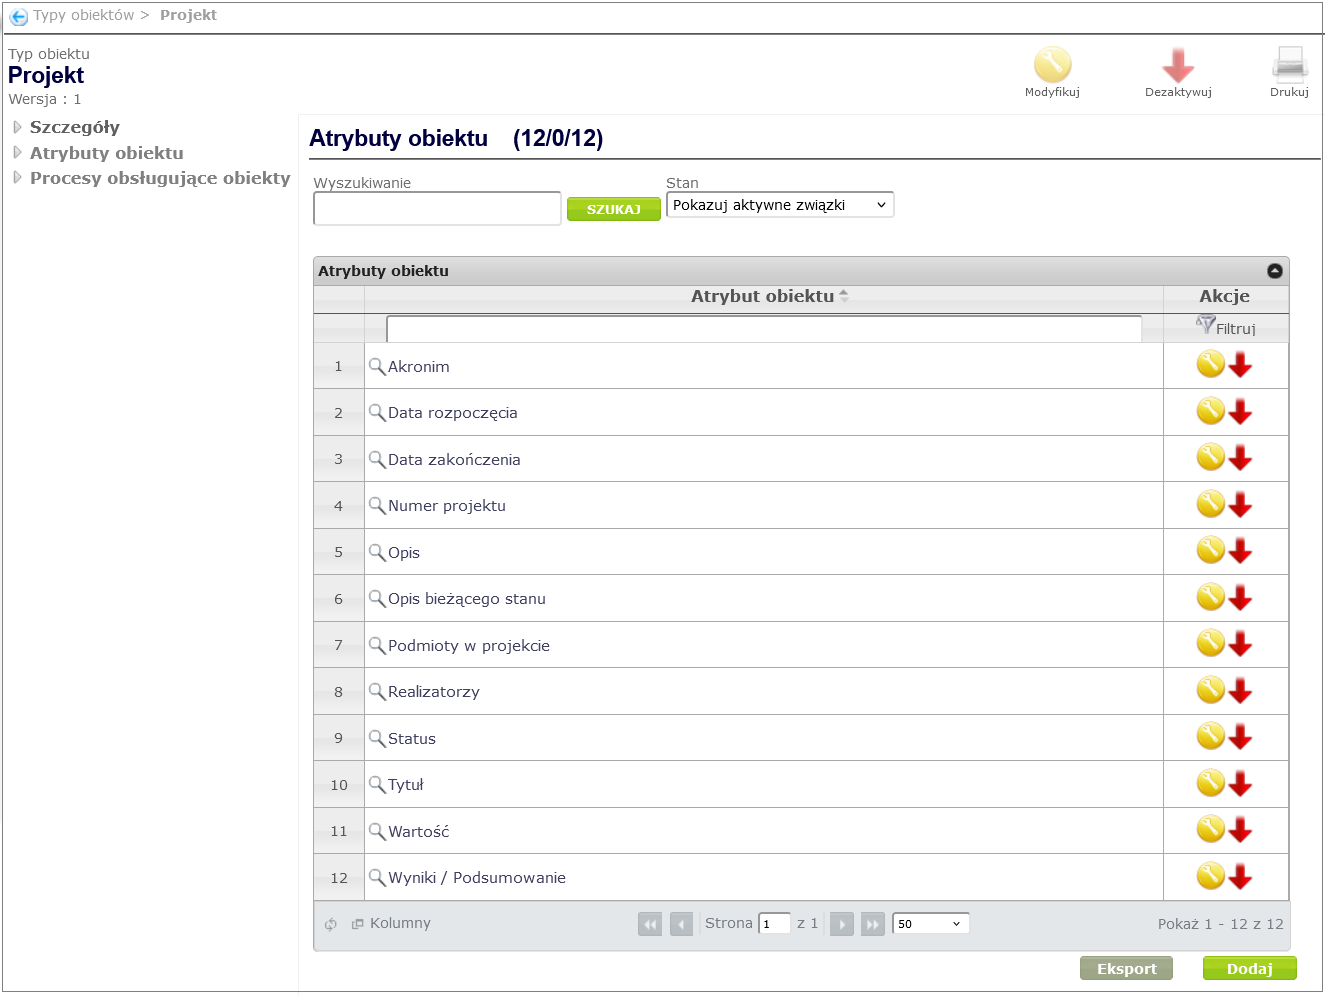
Figure 31. List of all attributes associated with the Project object type
Assigning a workflow process to an object type
To create a Workflow Process type concept, expand the Process and Form Design item in the Navigator menu, select Workflow Processes, and then click the Add button. In the Workflow Process Adding window ( Figure 32 ), complete the mandatory fields: Name and Identifier. You can optionally add a description of the process in the Description field.
Finally, confirm by clicking the Save button.
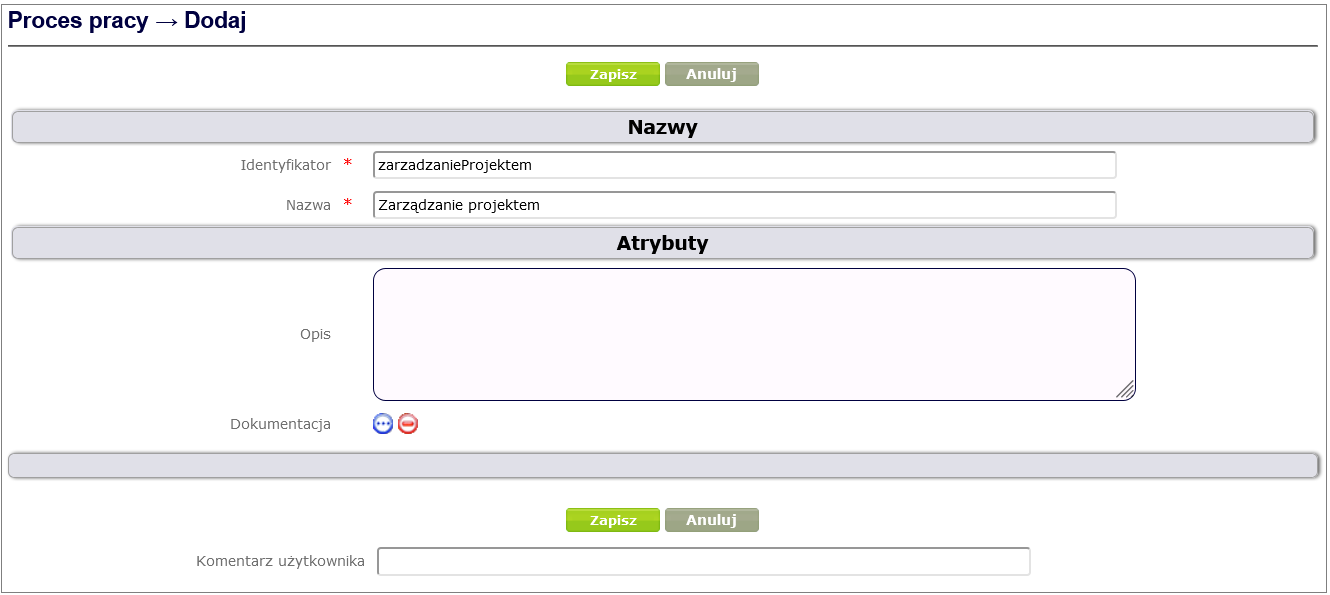
Figure 32. Creating a concept of the type Workflow process